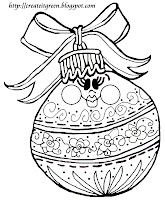
Welcome to the Create it Green Christmas Blog Hog! I hope you have enjoyed the other contributor projects so far. If not,---head over there first and follow along. The offical starting time is 12noon est, but since I have a craft show today, I posted a little early!
Let's Hop to it!!!
Supplies:
-Book from the thrift store or clearance rack, prefer
with hard cover, & content with pictures
-Sand Paper -Tape
-Craft Knife & Metal Ruler
-Glue Stick & White School Glue
-Decoupage Glue -Punches
-Tags & chipboard shapes
-Stamps, rubber & used postage
-Stickers, die cuts, Clip Art & photos
-Acrylic Paint, ink, watercolor & etc
-Paint Brush & permanent markers
-Scissors, straight & fancy edge
-Scrapbook, wrapping & wall paper scraps
-String, ribbon, lace & gold wire
-Prepare book cover, rub the shiny off the cover
using the sand paper, then dust off.
-Go through the book…paper clipping the pages
that are being saved. About half of the pages need
to be removed to make room for the layering,
to be removed to make room for the layering,
folding & other desired alterations. Don’t remove the page consecutively, cut randomly throughout the book to create evenness between the covers.
Keep 2 pages together where there is a slide out
planned. Paper clip together as a reminder.
-Remove the pages using a craft knife and a metal ruler. Lay the ruler behind the page that is being taken out. Place it close to the binding and run the knife along the ruler to cleanly take out. Tearing the page out could break the string in the binding.-Decide on “tabs”. Use puzzle pieces, tags, chip
board shapes, buttons, etc to create page makers.
Use 2 of each item and glue back to back---
trapping the page edge to create the tab. Face any
eyelets or holes out so ribbon can dangle out of
eyelets or holes out so ribbon can dangle out of
the edge.
-After tabs are created down the length of the book,
tear the edge on either side of the tab to short the
page and make the tab stand out. Then tear down
all the other pages so the tab really shows! The
pages that are being saved for slide outs should be
held and torn together to stay uniform.
-Tearing hint: Use a paint brush and water to
dampen the outline. Let it sit a few seconds, then
pull apart! It creates a nice ruff edge without the
-Fold pages & glue in place to create pockets .
-Plan a Slide Out. Decorate a tag and have it pull out of a slit in a page. Put a cutting board behind the page and use a craft knife to cut a slot slightly wider than the tag. Turn the page over and mark the area that the tag takes up, then glue the page to the next one –leaving the inside of the outline without glue.
Lightly paint the page and add details with a permanent marker. Follow the design template. Tie streamers to the tag.
-Painting over Text and existing photos doesn’t have to be uniform or solid. Leave special words or titles and photo areas unpainted to have the page say what you want.
-Making a Jumping Jack takes 2 pages. Paint and seal the front page to be dolled up! Decorate the page and the Jumping Jack Elf Template. Cut out. Punch 2 holes in each limb & tie with string as shown in diagram. Add a charm to the center string as a pull. Lay the arms & legs on the page and use a pen to mark the holes where the brads go on the page. Insert brads through limbs and page. Open brads on the back of the page & secure with tape. Glue the page back to the next page to encase the brad backs. On the front, use white school glue to secure the Elf head to the page. Once that is dry, a dot of glue can be adding to the head of each brad to give extra support to the elf body!
-Pages don’t have to be uniform. Tear it up!
-Save elements from old magazines to enhance the theme.
-Don’t be afraid to Experiment…you can’t make a mistake! You can always tape a page back in!
-Collage the cover using any scraps desired. Startby applying paint to camouflage any unwanted
words, pictures or authors. When gluing on paper,
paint the item on the back with decoupage glue,stick down, then brush over the front with more glue. Place the book in a slightly warm oven, the heat will suck any air out from behind the paper to make it a very smooth surface. Add stamps, stickers or photo cut outs to give the book a personality and title that suites your theme!

So-There it is . . . my favorite holiday album! Grab all the Freebie Digis and leave me some Comment Love and win this Fake Girl Scout Cookie, it's a Faux Samo! (Good enough to eat!)
Feel Free to ask any questions and I'll give the best responce I can. Sorry I am not a great writer, hope the instructions are clear! Please "Follow Me" too! Go over to the Create it GreenYahoo Group and look for my photo album labled-CyndiLou's Graphic Crafts- Blog Hop Pics. There will be all the Digis needed for your project!
Now it is time for you to hop to Jean's Blog for a Rustic Star! Happy Holidays!


15 comments:
this is really cool! I don't think i could ever come up with something as clever as this!
That's a cool idea. I homeschool my boys and I'm always looking for some new projects that they can work on for craft time. I think we're going to use a few of these techniques to make something! Thanks for the great idea!
Great ideas indeed . Love it
These are awesome. I love your digital images. I will print them off tomorrow and play.
Wow, Cyndilou! this is so cool!!!! Love that ornament digi!!! She's a cutie!!!
wow!!! i love it!!! such inventiveness and creativitiy! I ADMIRE YOU!
I love that jumping jack elf...tooo cute!!! TFS
Terry
Your album turned out fabulous!!!
This is a fantastic idea and love the bright colors!
I Abslotely love that jumping elf idea!!!
Thanks so much!
Love this idea!!Each page a wonderful surprise! Thanks for sharing the images..they are great!!
Wow, so much inspiration! Thanks for the images too :)
Greets dudes!
It is my first post here wanted to say hi
Bye everyone!
Well, the post is in reality the freshest on this precious topic. I agree with your conclusions and will eagerly look forward to your approaching updates. Just saying thanks will not just be adequate, for the fantasti c lucidity in your writing. I will instantly grab your rss feed to stay informed of any updates. Genuine [url=http://pspgo.info/favorites.html]humor[/url] work and much success in your nice blogs!
Post a Comment